Running Locally
Requirements
This following packages need to be installed in order to bring up the eSimMon stack:
- docker - install instructions can be found here
- docker-compose - install instructions can be found here
Outline of Services
Bringing up the stack will create a series of Docker containers that allow the use of the eSimMon Dashboard, and each container supports a role in that process.
- docker-compose.girder.yml: Data management platform that uses MongoDB to store and retrieve data. See the Girder docs for more detailed information.
- docker-compose.ansible.yml - Ansible playbook to setup the Girder instance. The playbook will automatically create an
assetstorefor storage (in this case on the local file system), acollection(top-level directory) for the data, afolderwithin that collection (where data will be uploaded to), one administrative user, and an API key (required for data ingest). See the Ansible docs for more detailed information. - docker-compose.client.yml - Builds the client application and uses NGINX to make the app available on http://localhost:9090. See the client docs for more detailed information.
- docker-compose.watch.yml - Runs a Python script to watch the location where the data is being hosted and upload that data to Girder as it becomes available. See the watch docs for more detailed information.
- docker-compose.watch-standalone.yml - Runs the same monitoring code as
docker-compose.watch.yml, but does not require that theGirdercontainer be run as well. Used to run the monitoring service outside of the stack.
- docker-compose.watch-standalone.yml - Runs the same monitoring code as
- docker-compose.fastapi.yml - A FastAPI service responsible for the endpoints that extracting data from the ADIOS
.bpfiles as well as building movies and images for download. See the FastAPI and schema docs for more detailed information.
Setting up environment variables
To setup the Girder instance one admin user is created: esimmon. The password for this user must be set in the .env file located in eSimMon/devops/docker under the ADMIN_PASSWORD key.
Create and setup the Girder instance
To create the Girder instance, you will need to have set the ADMIN_PASSWORD key mentioned above, then run the following command:
cd <repo>/devops/docker
docker-compose -p esimmon -f docker-compose.girder.yml -f docker-compose.ansible.yml up
If successfull it will return esimmon_ansible_1 exited with code 0, after which you can use ctrl-c to bring down the stack. This should only need to be run once for the initial setup. If the Girder database is removed and the setup needs to be re-run be sure to reset automatically generated environment variables. This can be done by running the following:
git checkout -- <repo>/devops/docker/watch.env
Bringing up the stack
To bring up the full stack each time run the following command:
cd <repo>/devops/docker
docker-compose -p esimmon \
-f docker-compose.client.yml \
-f docker-compose.girder.yml \
-f docker-compose.fastapi.yml up
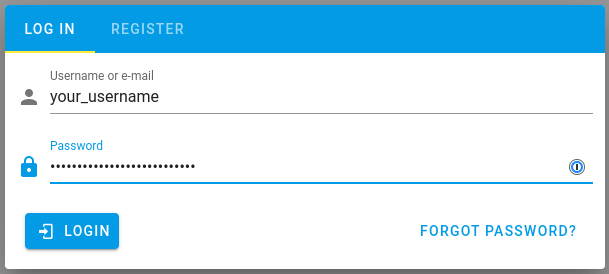
The dashboard will then be exposed on http://localhost:9090. When you access the dashboard you will see the login prompt, which is where you will enter the esimmon username and ADMIN_PASSWORD set in the .env file.
Bringing up the monitoring service with the stack
cd <repo>/devops/docker
docker-compose -p esimmon \
-f docker-compose.client.yml \
-f docker-compose.girder.yml \
-f docker-compose.fastapi.yml \
-f docker-compose.watch.yml up
When the docker-compose.watch.yml file is included in the docker-compose command, all shot/run data will be ingested and any runs in progress will continue to populate the database as steps are added. When the initial data has been ingested the watch script will continue to run, but you will know all existing data has been completely uploaded when you see the following:
watch_1 | [date] [time] - adash - INFO - Fetching /shots/index.json
This message will appear once every 30 seconds as the script continues to watch for new timesteps that may have been added. If there is an error message or you do not see the Fetching /shots/index.json message after the console output has slowed down or stopped, you can get help by creating an issue with the console output that you are seeing.
Running the monitoring service separately
In order to run the watch service outside of the stack, the following environment variables will need to be set inside the watch.env file:
UPLOAD_SITE_URL- Should be the URL of the site that the data is being exposed on. This is what the script will monitor for new and existing timesteps.GIRDER_FOLDER_ID- The ID of the folder that the data should be uploaded to in the Girder database. This ID will need to be updated each time the upload location needs to be changed.GIRDER_API_KEY- The API key for the Girder instance that the data is being uploaded to. As explained above, this key will automatically be set when the Girder instance is created, but in order to use a different instance.GIRDER_API_URL- The URL for Girder instance that the data will be uploaded to.
The container can then be brought up with docker-compose:
cd <repo>/devops/docker
docker-compose -p esimmon -f docker-compose.watch-standalone.yml up
See the watch docs for additional information, including running the script without the Docker container.
If the container starts up successfully you should see the following message at the very beginning, showing that the upload site set in the UPLOAD_SITE_URL is being watched for updates:
watch_1 | [date] [time] - adash - INFO - Watching: [UPLOAD_SITE_URL]
Once any pre-exisiting data is uploaded you will see messages indicating that the monitoring service is still running. The following message will appear every minute or so:
watch_1 | [date] [time] - adash - INFO - Fetching /shots/index.json
Bringing down the stack
docker-compose -p esimmon \
-f docker-compose.client.yml \
-f docker-compose.girder.yml \
-f docker-compose.movie.yml \
-f docker-compose.watch.yml down